Learn how to make DIY Quidditch pitch viewing stands out of foam-core board and card stock — a fun and easy project for you and your kids.
Supplies
- 4 Foam-Core Boards (I got mine at the dollar store)
- Straight Pins
- Hot Glue Sticks
- Colored Card Stock: Red, Blue, Yellow, and Green
- White Card Stock
- Double-Sided Tape or Glue of Choice
- Wooden Skewers
- Optional: Rice (for added weight)
Tools
- Hot Glue Gun
- Cutting Mat
- Straight Edge
- Utility Knife
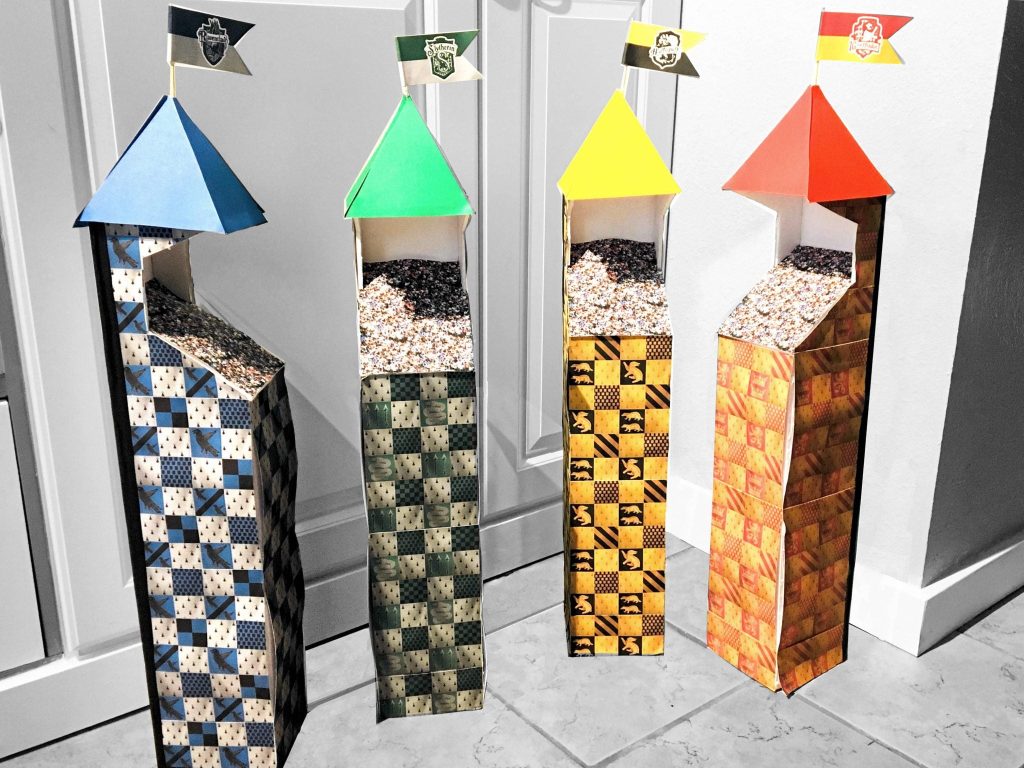
For Halloween this year, my family is participating in a Trunk or Treat. We decided that we wanted to do a Quidditch game since we’ve been really into Harry Potter lately. I found multiple table-top and outdoor Quidditch games on Pinterest and adapted these ideas to fit in our trunk. In this post, I’ll show you how my kids and I constructed the viewing stands. We decided that we wanted one for each Hogwarts house, so we made four. Already guessing which one would you belong to?
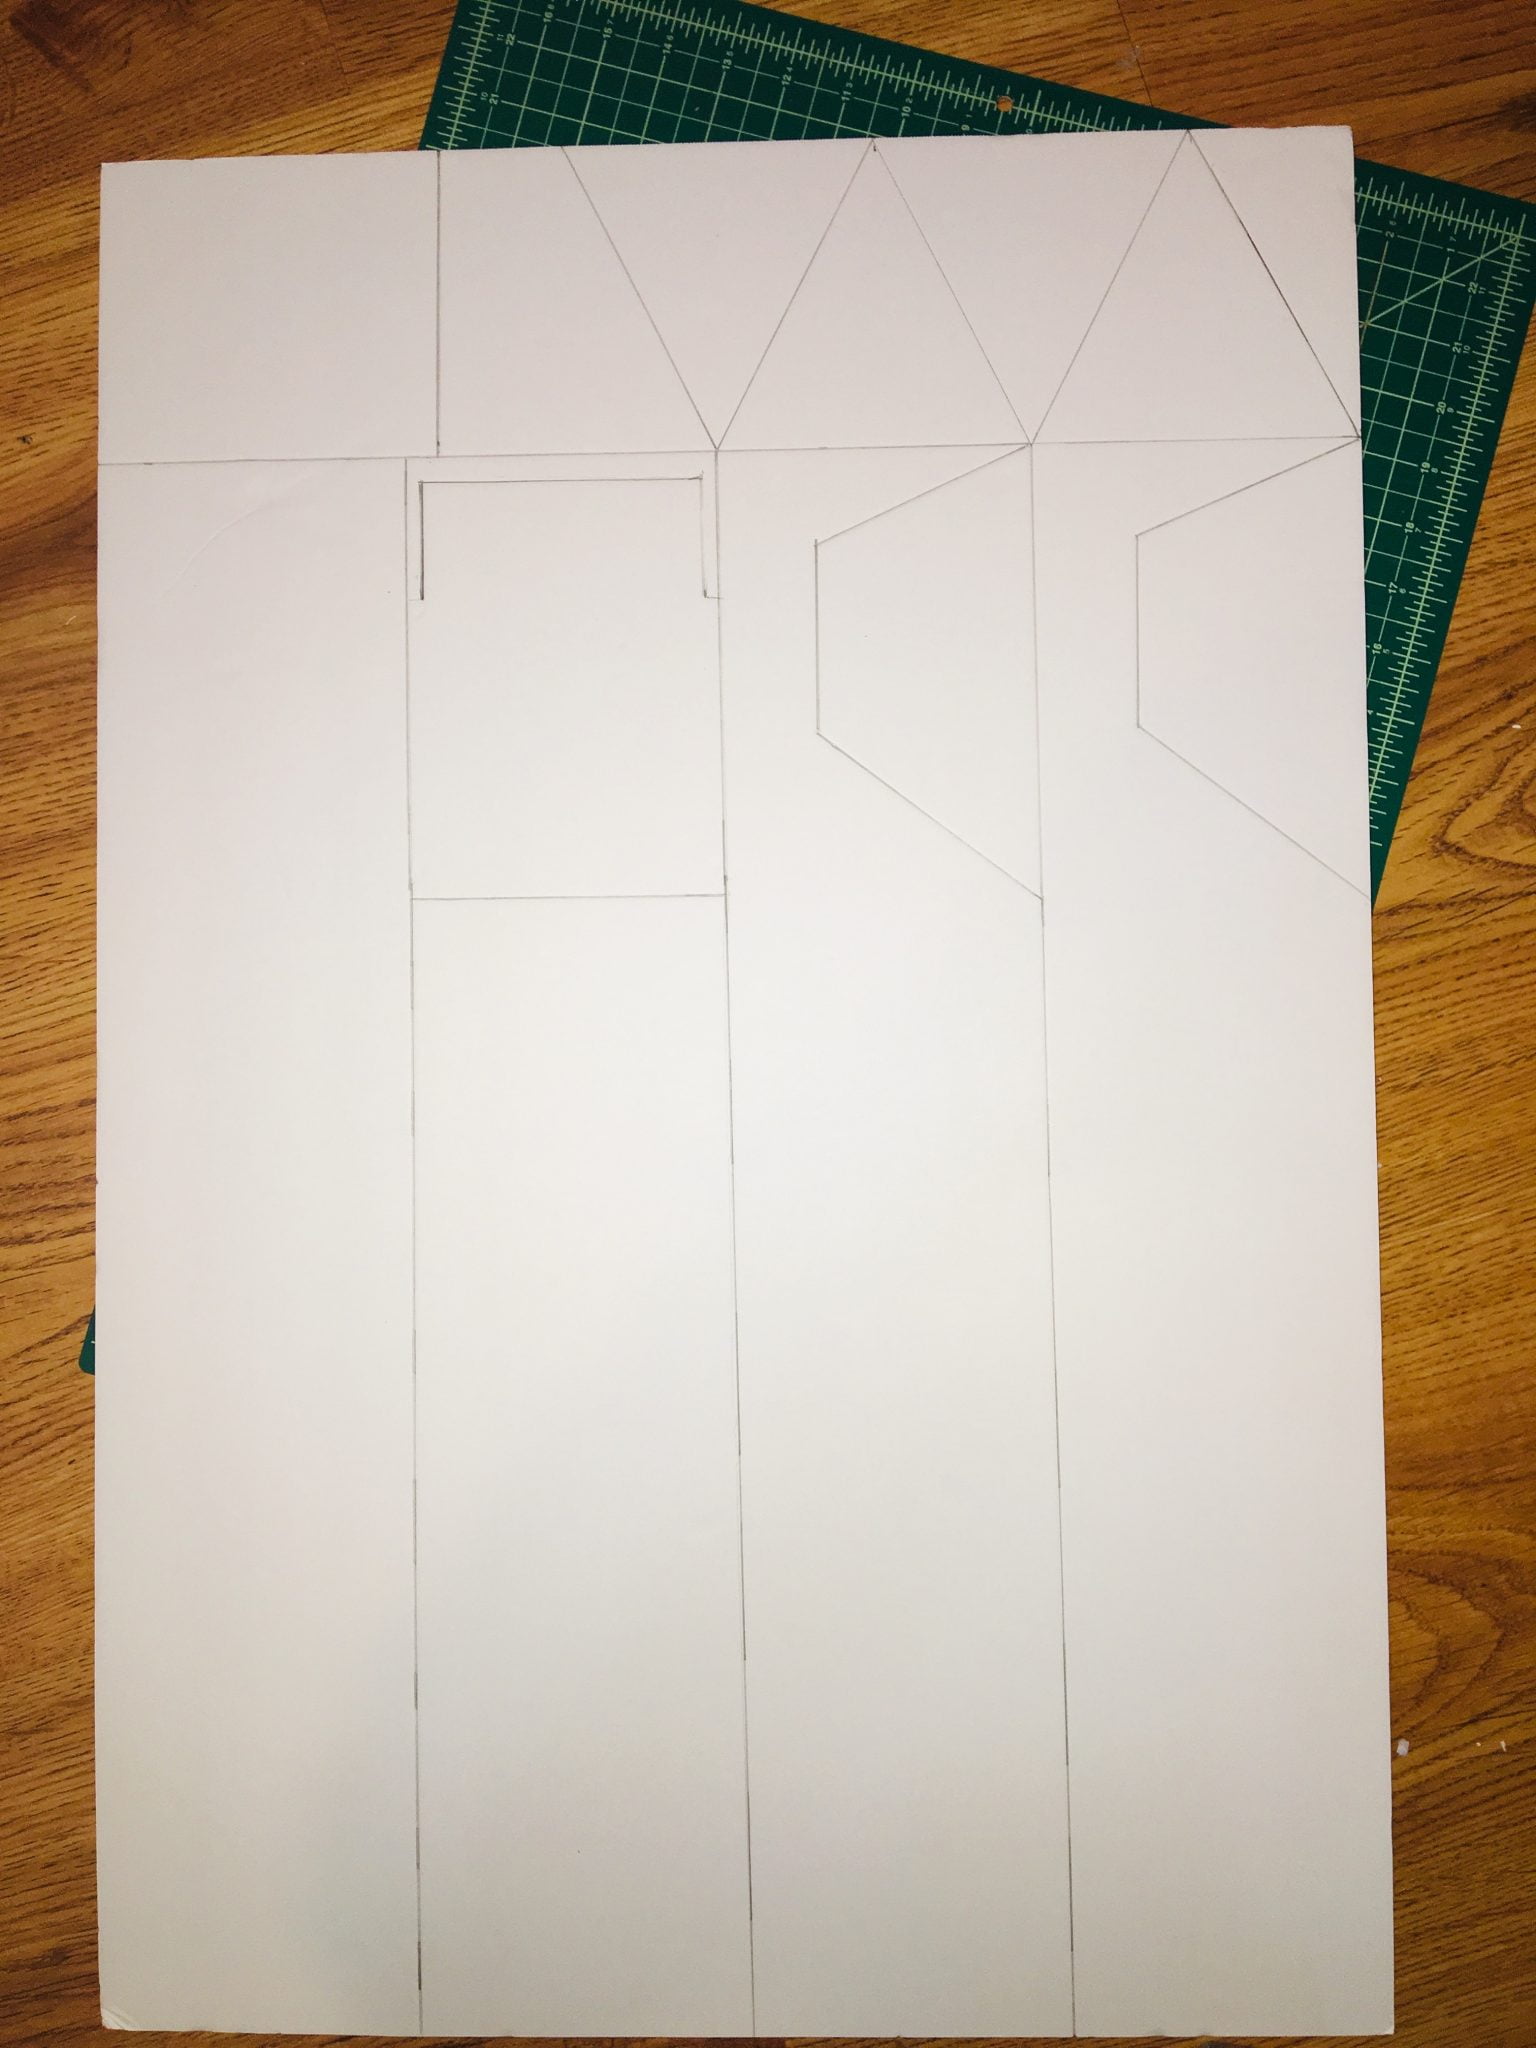

How to Cut Your Foam-Core Boards
My foam-core board was 29.75″ by 20″, so adjust if yours is a different size. I planned out the measurements so that I only needed one foam-core board per viewing stand. The first photo above shows all the lines I drew on my board. In the next photo, you can see all my measurements. The parts I’ve highlighted blue are extra pieces. I started by marking 5″ down from the top. Next, I measured 4-5″ wide sections across the bottom. Finally, I marked all the smaller pieces. For the triangular roof pieces, I measured 2.5″ in from the side, then 5″ and another 5″. Then, I drew diagonal lines to connect my marks and form the triangles.

Once I had marked all the measurements and lines, I cut out the pieces using a cutting mat, straight edge, and utility knife. You can cut the lines without a straight edge, but I found it very helpful. I cut the foam board the same way I drew it up. First, I cut the long straight lines and then moved on to the smaller, more intricate pieces. I did all the cutting, but my kids helped me a lot with other parts of the project.


How to Assemble Your Boards
To attach all the pieces together, I used hot glue and straight pins. First, I applied hot glue down the edges and placed the corresponding pieces together. Then, I placed a straight pin in each corner and a couple down the middle to provide extra stability (5 straight pins down the long sides and fewer for the smaller pieces). I started by gluing the sides to the back, as shown in the first picture above. Next, I attached the front and the bottom. I constructed the roof separately and then glued and pinned it to the main structure. I DID NOT GLUE the crowd seating area down, but only pinned it in place in case I wanted to remove it easily later. (This proved very helpful when we finally put the whole trunk together. We opened up the stands and added rice to weigh them down and keep them steady.)


Decorate Your Viewing Stands
The kids did most of the decorating, and I just helped. We used double-sided tape for just about everything. As you can see, they aren’t stuck down everywhere. They kind of look like they’re flapping in the wind, which we felt matched the scenes from the Quidditch World Cup. We glued the flags around wooden skewers and stuck them through the peak of the roof.
- Roofs: Cut from colored cardstock.
- Sides: Printed desktop backgrounds on white card stock. You can find the images here.
- Crowd: Printed “crowd image” on white card stock. I used this one.
- Flags: I printed these Free Printable Hogwarts House Flags.
Save and Share this Project!! Click Here to Pin!!


Thank you for sharing the instructions. Will be making these this weekend for a dinner party!
You’re Welcome Anja!! So glad you found the post helpful.
It’s really cool and I made it for a project for my kids to! Harry Potter all around! Obviously it wasn’t as amazing as yours but it’s great and we got first prize thanks to you! ❤️
Thanks Iona!! I’m so glad you had fun and got 1st prize too!!
Clocked the link for the siding for the stands but not sure how I am able to print them.
You can copy the image off the website and paste them into another program to print them.