Nutrition: 567 Calories | 70.8g Net Carbs | 4.2g Protein | 29.6g Total Fat
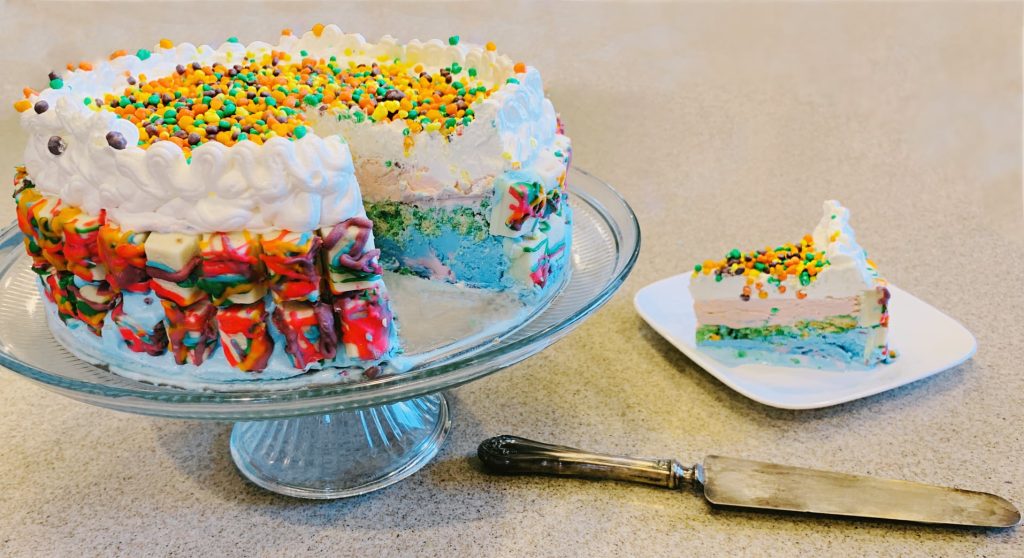
This homemade unicorn ice cream cake is filled with a rainbow of colors, layers of ice cream and a cookie crumble. A magical combo that’s easy to make too.

I’ve been dreaming up this recipe for a while now. My youngest daughter just turned 7!!! My kids love birthdays (who doesn’t), and they usually start talking about birthday plans months before their special day. Well, my youngest requested a unicorn ice cream cake for her birthday. And I like to make dreams come true. I have a friend back in Washington who makes ice cream cakes for every birthday because they are so easy. And she’s right. Making homemade ice cream cakes is all about layers. It doesn’t take much work, you just have to give each layer a chance to freeze before adding the next one. The birthday girl asked for a fruity cake with lots of color and no chocolate. So, I started brain storming easy ways to make some delicious, fruity layers.

Rainbow Colored Kit Kats Around the Outside
There are lots of fun ways to decorate the outside of your ice cream cake. We went with white-chocolate Kit Kat candy. I tried to find regular sized Kit Kat bars, but I wasn’t able to track down any in the white creme flavor. So, I went with the minis. I do think regular size would be a little easier to use, but the minis worked fine. In order to create a unicorn inspired rainbow of color on the outside of the cake, we had to decorate the Kit Kats. All you need is candy melts in a variety of colors and coconut oil.
First, lay out the wafer candies on a cooling rack. Next, put a few candy melts in a small zip top bag with half a teaspoon of coconut oil. Put each color in a separate bag. Then, microwave the candy and oil in 30 second intervals until it’s all melted. It takes about a minute and a half. Finally, cut a small corner off the zip top bag with scissors, and drizzle the colored chocolate all over the Kit Kats. Repeat for all the colors. I let my kids do the decorating, and they made a beautiful tie-dye rainbow. Once all the candies are decorated, put the whole cooling rack in the freezer, and let the candy melts harden.

First Layer: Cotton Candy Ice Cream
While the Kit Kats are hardening in the freezer, prepare a large spring form pan by putting parchment paper on the bottom. Also, take the ice cream out of the freezer to let it soften a little. The colored candy drizzle should be hard after about three minutes in the freezer. When they’re ready, line the edges of the spring form pan with the Kit Kats. Since we used the minis, we stacked the Kit Kats two high with the colors facing out.
Once the Kit Kats are lined up, it’s time for the first layer of ice cream. So, scoop half a container of ice cream (0.75 quarts) into the center of your spring form pan. Then, use a spatula to smooth out the ice cream to the edges and make an even layer. Be careful not to knock down the Kit Kats. (After this layer, the ice cream will hold the candy border in place.) The birthday girl picked out all the ice cream flavors herself. On the bottom we used Cotton Candy ice cream by Market Pantry from Target. Once the ice cream layer is ready, put the whole pan in the freezer for at least two hours to harden.

Homemade Hard Shell
For the next layer, we made homemade hard shell topping. In the past, I’ve bought Magic Shell ice cream topping in fun flavors like orange creme and birthday cake. I searched and searched my local grocery stores for some more for this cake, but I couldn’t find any. So, I decided to make my own. The secret ingredient in magic shell is coconut oil. Coconut oil solidifies at a much higher temperature than other oils, so it will “magically” harden when it hits ice cream. Fun right?
To make homemade hard shell all you need it coconut oil and chocolate. Or in our case, colored white chocolate candy melts. My girl chose green because it’s her favorite color. Simply melt the candy melts and coconut oil together, and you have hard shell. You can store the homemade hard shell in a jar in the pantry until it’s time to create some ice cream magic.

2nd Layer: Crunchy Cookie Crumble
In the middle of ice cream cake is always a fun crunchy layer. This crunchy cookie layer is so easy to make. First, put some vanilla sandwich cookies, like Golden Oreos, in a large zip top bag. Then, let the kids have fun making crumbles with a rolling pin. When the cookie pieces are the right size, pour them into a mixing bowl. Add your homemade (or store bought) hard shell topping to the bowl, and mix it all together. Finally, pull the ice cream cake out of the freezer and spread the cookie crumble layer over the top. Once you have an even layer, put the cake back in the freezer for about fifteen minutes to let the magic shell harden.

3rd Layer: Unicorn Ice Cream
The next layer is half a container of ice cream. Let the ice cream sit at room temperature for a few minutes to make spreading easier. Then, pull the ice cream cake out of the freezer. Make a nice even layer of ice cream, and put the cake back in the freezer for at least two hours. When it came to picking ice cream for the unicorn ice cream cake, the unicorn ice cream was the most important. Both Wal-Mart and Target sell unicorn inspired iced cream. Wal-Mart’s unicorn ice cream is cake flavored. After much thought, the birthday girl decided to go with Target’s Unicorn Magic Ice Cream by Market Pantry. It is fruity flavored with a sour raspberry swirl. This way she could have fruity and cotton candy. Some other great flavor choices for unicorn ice cream cake would be: birthday cake, strawberry, sherbet, and circus cookie.

Final Layers: Whipped Topping & Nerds
After your second layer of ice cream is fully hardened, it’s time to finish this cake up. The next layer is whipped topping. Normally, you find whipped topping in the freezer section at the grocery store. When you bring the whipped topping home from the grocery store, keep it in the refrigerator. That way it’ll be thawed and spreadable when it’s time to add it to your unicorn ice cream cake.
First, spread about half of an eight ounce container of whipped topping evenly over the top of the ice cream cake. Then, put the remaining whipped topping in a pastry bag fitted with a decorating tip. Finally, pipe a border around the edge of the cake. I went around the cake twice adding a second border layer on top of the first.
The last step is to decorate the cake with Nerds candy. Fill in the area you created with the whipped topping border. You could also decorate the top of the cake with sprinkles. We went with Nerds candy for even more fruity, colorful fun. When the ice cream cake is all decorated, put it in the freezer. Keep the cake in the freezer until it party time. When you’re ready to serve the cake, remove the ring on the spring form pan. Let the cake warm up for a few minutes; then slice and serve. Enjoy your homemade unicorn ice cream cake!!

A Few Thoughts About Piping Frosting
I am not a professional cake decorator. But, I have fun making cakes for our family. I learned years ago to give myself a break; it doesn’t have to be perfect. Now my kids enjoy making cakes too, and I want them to have fun and not get frustrated. When I was planning this recipe, I wanted it to be really easy to make (easy enough for an almost 7 year old).
If you don’t have piping bags and decorator tips, don’t rush out to buy some (unless you really want to). Zip top bags are great substitution. Add your frosting or whipped topping to a large bag and remove all the air. Then, snip the corner of the bag and start piping. I like to practice on a plate first to figure out the right look. I think it’s most important to have fun. It’ll taste great no matter what.


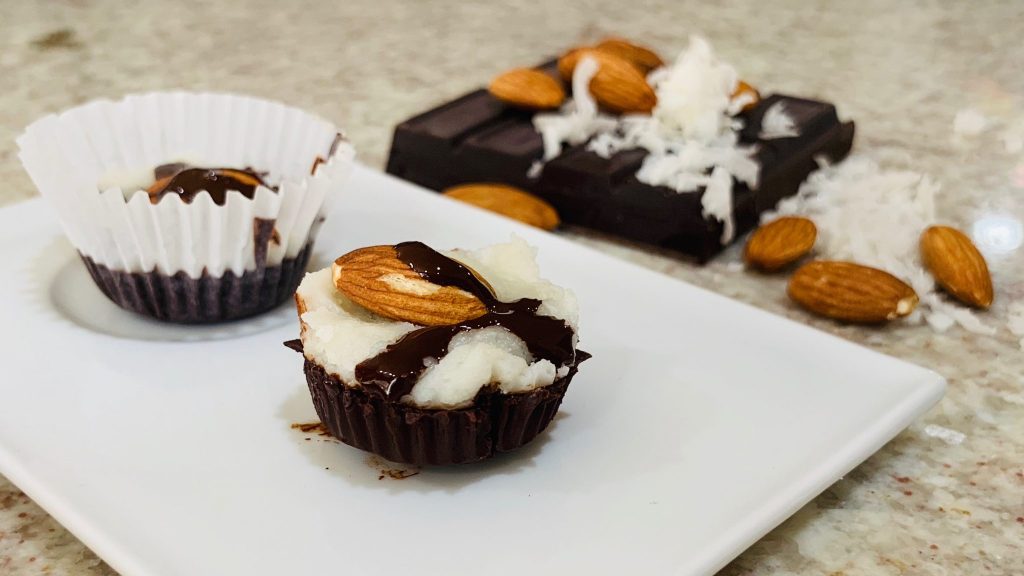
Other recipes to check out: Creamy Coconut Popsicles, Keto Strawberry Cheesecake Bars, and Lavender Ice Cream.
Easy Homemade Unicorn Ice Cream Cake – Step by Step Instructions
This homemade unicorn ice cream cake is filled with a rainbow of colors, layers of ice cream and a cookie crumble. A magical combo that’s easy to make too.
Total Time: 5 hours + Freeze Overnight
Prep Time: 1 hour
Inactive Time: 4 hours + Freeze Overnight
Ingredients
- 0.75 qt Market Pantry Unicorn Magic Ice Cream (Half a container)
- 0.75 qt Market Pantry Cotton Candy Ice Cream (Half a container)
- 11.4 oz (1.5 bags) Kit Kat Mini White Cream Candy
- 6 oz Candy Melts in Various Colors (Purple, Blue, Green, Orange, Pink or Colors of Choice)
- 5 oz Rainbow Nerds
- 11.5 tsp Coconut Oil, divided
- 8 oz Whipped Topping, thawed
- 12 Golden Oreos or Vanilla Sandwich Cookies
Directions
- Lay out the Kit Kat candies on a wire cooling rack. Put 0.5 ounce candy melts in a small zip top bag with 1/2 teaspoon of coconut oil. Remove all the air, and seal the zip top bag. Repeat for all five candy melt colors; one color per bag. Microwave one bag of candy on 50% power for 30 seconds. Remove the bag and mix the candy and oil together by squishing the bag. Microwave again on 50% power for 30 seconds, and repeat until all the candy is melted and mixed with the oil (about 1.5 minutes per bag). Use scissors to cut a small tip off the corner of the bag. Drizzle the colored candy all over the Kit Kat candies. Repeat for all the colors creating a colorful decoration on top of all the Kit Kats. Move the whole cooling rack to the freezer and allow the colored candy melts to harden, about 2-3 minutes.
- While the candy is in the freezer, prepare a large spring form pan. Cut parchment paper in a circle and line the bottom of the pan. Remove the cotton candy ice cream from the freezer to let it soften slightly. When the Kit Kats are ready, remove them from the freezer. Line the outside of the spring form pan with the decorated Kit Kats, with the colors facing outward. Stack the Kit Kats two high to line the whole outer edge of the pan.
- Scoop half the container of cotton candy ice cream into the middle of the spring for pan. Use a spatula to carefully smooth out the ice cream creating an even layer on top of the parchment paper. Put the pan in the freezer for at least 2 hours for the ice cream to harden.
- When the first layer of ice cream is frozen, put the Oreos in a large zip top bag. Remove the air and seal the bag. Use a rolling pin to crush the cookies into small pieces. Pour the crushed cookies into a mixing bowl.
- In a separate bowl, add 3.5 ounces of candy melts and 3 tablespoons of coconut oil. Microwave on 50% power in 30 second intervals, stirring each time, until all the candies are melted. Pour the melted candy mixture over the crushed cookies and stir together until the cookies are completely coated. Remove the ice cream cake from the freezer, and pour the cookie mixture over the top of the cake. Spread out the cookie crumble into an even layer and put the cake back in the freezer for 5-7 minutes for the melted candies to harden.
- Remove the unicorn ice cream from the freezer to let it soften. When the cookie crumble layer is hardened, remove the ice cream cake from the freezer. Layer half a container of unicorn ice cream over the top of cookie crumble. Spread out the ice cream in a smooth layer, and return the cake to the freezer for at least 2 hours.
- When the ice cream is hardened, take the cake out of the freezer. Spread half of the container of whipped topping over the top of the cake. Put the remaining whipped topping in a piping bag. Pipe a border around the edge of the cake; go around the cake twice making the border double high. Fill in the top of the cake, inside the piped border, with the Nerds candy. Put the finished cake back in the freezer overnight to fully freeze.
- Right before serving, remove the outer ring of the springform pan. Let the cake warm up for a few minutes. Then, slice and serve. Put any remaining ice cream cake back in the freezer. Enjoy.
Nutrition:
Yield: 12 servings, Serving Size: 1/12 Slice of Cake
Amount Per Serving: Calories: 567, Total Fat: 29.6g, Saturated Fat: 21.5g, Cholesterol: 33.7mg, Sodium: 134.9mg, Carbohydrates: 70.8g, Fiber 0g, Sugars: 55.3g, Protein 4.2g
Save and Share this Recipe!! Click Here to Pin!!